Thursday, October 23, 2014

Exciting Things Are Happening In The Food World...

Exciting things like caviar made from seaweed.  Yes, I said seaweed.  How they did it is a mystery (a.k.a. proprietary secret), but they will be saving some of the endangered species!

"Real caviar" is harvested from sturgeon fish - mainly the Beluga (most expensive), Osetra, and Sevruga.

The fish are usually killed in this process.

The meat may be sold at market, so waste can be avoided, but overfishing is still an issue.  Some of the wild populations have decreased globally as much as 93%, due to overfishing, bycatching, poaching, and loss of habitat via dam building.  As a result, the Beluga sturgeon was listed as Endangered as early as 1996.  Though there are still some wild Beluga populations, a few rely on stocking and, in other areas, they are "regionally extinct."  In an effort to reduce strain on the already distressed species, the U.S. banned the importation of beluga caviar in 2005, and it became illegal to transport any remaining caviar across state lines.  Even with this ban, the populations continued to dwindle.  As of 2010, the Beluga sturgeon was placed on the IUCN Red list of endangered species and cited as Critically Endangered.  It is at these late stages that conservation efforts are increasing.  There are now fish farming operations in existence that stock live fish, and supply sturgeon caviar to try and help fight the decline.  Some have found ways of harvesting the roe without killing the fish, but the price is still high, and fish live out their life in an overcrowded tank- surely this is not ideal.  Sustainability here is questionable.  The fact remains that sturgeons take years to mature; Beluga females clock in between 15 and 18 years before being ready to spawn (other species from 8 years - still a long time).  This only begins to illustrate the issue.  When you take into account the complex breeding patterns involving seasons, temperatures, locations, etcetera, you start to see the larger picture.  There is also evidence suggesting that pesticides are negatively affecting their ability to spawn in the wild (sound familiar?).  To further complicate the issue, as the species gets rarer, the price goes up.  This creates an even greater temptation for poachers; a 2009 record indicated that Beluga caviar had reached $8,000.00 U.S. dollars per Kilogram (approximately 2.2 lbs).  A website listing has the current price per Kilo at $10,560.00 USD.  Though it says that the item is "discontinued," and there are two sentences about the ban on U.S. trade, you can still see the price and light images of the product.  The website also says that the ban was effective as of "April 2007."  Typo?  According to the Federal Register, the "notice [of the ban was] effective September 30, 2005."  Something 'fishy' going on here - it doesn't seem like they were in a hurry, and at the very least, it's apparent that not quite enough is being done to protect this species.  The caviar from the other two sturgeon species, Osetra and Sevruga (sometimes referred to as more "affordable"- my question is 'for who?'), are still a fair chunk of change.  Unless you're prepared to shell out $300 for a 2 oz tin, you won't be tasting these anytime soon.
But what if there were a completely sustainable and stably-priced (and Vegan!) alternative?

Enter Caviart®.


Made in a variety of flavors and colors, and affordable for everyone, Caviart® is a truly sustainable, fish-friendly, and green option.  It tastes just like lumpfish caviar - it has the look, flavor, and texture (and the little 'pop') of real fish roe.  You really need to taste it to believe it.  Serve it on some mini-toasts with pate or creme fraiche - your guests will be impressed.

I wish I could tell you exactly where it's available; It's a very new product to the U.S.  Your best bet is to ask your local stores to get ahold of it.  If you're in the Midwest/Central U.S., have your store contact Long Grove Specialty Foods (brokers for the Midwest & Central region).


Sources:

"The Beluga's Blues." by Anita Hamilton. Time Magazine Online. April 10, 2003.  http://content.time.com/time/magazine/article/0,9171,407380,00.html

"Huso huso (Beluga, European Sturgeon, Giant Sturgeon, Great Sturgeon)." Gesner, J., Chebanov, M. & Freyhof, J. 2010.  Huso huso The IUCN Red List of Threatened Species. Version 2014.2. IUCN Redlist of Endangered Species. http://www.iucnredlist.org/details/10269/0

"About Caviar." http://www.igourmet.com/caviar.asp

"Sevruga."  http://www.caviarexpress.com/Russian-Sevruga-Caviar

"U.S. to Ban Imports of Beluga Caviar." by Felicity Barringer. Washington, NY Times Online. September 29, 2005.

Tuesday, June 17, 2014

Chocolate du jour

Chocolate, in recent years, has become the source of both considerable delight and substantial disappointment.  When the chocolate is real, and by real I mean actual chocolate- not just corn syrup and fillers, it is a wonderous thing, nigh irresistible.  When it has reached "Halloween Candy" status, as my family has dubbed it, it is somewhat of a disappointment.  Without bashing names, it has become apparent to me (and several of my friends will also attest to this) that the candies I once ate as a kid have had their formulas changed several times - they just don't taste as good as they used to, and now include corn syrup, soy (and it's various forms), overly refined sugar, emulsifiers, preservatives, artificial flavorings, colorings, and an extra dose of instant heartburn.
Fortunately, I've found refuge.  There are some companies/brands that are making real chocolate, and there are several of these that are doing it very very well.  Normally I do not feel the need to write about chocolate.  However, when chocolate is truly spectacular, it most definitely necessitates written acknowledgement.

The Hot Chocolate Sparrow, Orleans, MA

When you enter the store (locals and cool kids come in the back door), you are almost immediately greeted by the sweet smells of freshly brewed coffee, pastry, and chocolate.  It's not a very big store, and not very flashy - but it is a very inviting space, and really it's the sweets and the camaraderie that you come for anyway.  To one side of the store is a long and wonderous glass countertop filled with all kinds of delightful chocolaty items.  The chocolate is all hand made, with their own recipes. They have everything from the expected solid chocolate (white, milk, and dark), to the adventurous, including chocolate covered fruit or coffee beans and chocolate bark with sea salt - that's right... sea salt.  I was skeptical of this new offering at first, but my doubt soon turned to love after one taste.  This combination of salty and sweet is very dangerous, especially if you are hungry.  The one piece of bark purchased did not last long, it barely made it to the car, hence the lack of a photograph (like I said, dangerous).  In addition to the salty bark, there are chocolate truffles; equally addictive if not more so, and a host of other delectable items.  I find it almost impossible to leave without a bag full of goodies.
If you have extra time, and a good friend, it's absolutely worth it to order a fancy dessert, or open that box you just purchased at the glass counter, and enjoy it with a nice cup of freshly brewed coffee.

I found the following two chocolate bars in The Main Street Gourmet (Orleans, MA), and I hope to find them somewhere locally soon as I cannot get to Orleans often.


Villars Larmes de Poire Williams


This milk chocolate bar filled with Poire Williams (Villars, Product of Switzerland) was absolutely amazing.  If you have the chance, I recommend you try it. Smooth chocolate, a little bit of crunch from the natural sugars in the Poire William, and the sweet aftertaste of ripened pears.  (Poire William is that pear brandy that you frequently see with a whole pear in the bottle - The great secret of the whole fruit in a glass bottle? They place the bottle over the pear while it's small and growing on the tree.)


Dolfin Noir Lavande Fine de Haute-Provence

The Noir Lavande Fine de Haute-Provence (Dolfin, Product of Belgium) is a bar of smooth, rich Dark Chocolate with lots of Lavender flowers.  Bite into a square and breath through the nostrils at the same time for the full experience.  It is an unusual sensation of eating chocolate-covered flowers. It is possibly not for everyone, as lavender can be a strong flavor, but I adore lavender in chocolate, and ice cream.  Croatia sparked my interest in Lavender (where I first tasted the lavender ice cream) it's very popular there and is grown all over the place.  I have been inspired to plant several pots of it in my patio herb garden, and I intend to experiment!

Big Chunks of Fruit!

Dagoba

Another delicious discovery; Dagoba Organic Chocolate.  My most recent favorite being their Roseberry variety, with big pieces of raspberries and rosehips in dark chocolate.  They make 12 different chocolate bars, as well as tasting squares, drinking chocolate, and several other products. (Sci-Fi geek note: Yes I will admit that I did find the name similarity Dagoba vs. Dagobah amusing. Just to clarify, Dagoba is chocolate, Dagobah is a fictional planet from the movie Star Wars.)

The Chocolate Garden

Most recently, I was fortunate enough to be able to stop in at The Chocolate Garden in Coloma, Michigan.  They are a purveyor of spectacular handmade truffles, in 26 flavors!  There is a reason they "have been featured repeatedly on The Food Network as well as Fine Living TV and the Travel Chanel."  These truffles are truly a wonder to behold (cue ethereal music)- an incredibly smooth center, perfect balance of flavor - you will feel like royalty just biting into one.  Don't worry- you don't have to go all the way to Michigan to get them, you can order online.  Handmade with high quality ingredients, and some unique flavors like Vanilla Rose (real distilled rose petals), Citrus Ginger, and Cayenne Kick - these truffles are extraordinary.

I hope to make more fascinating chocolate discoveries...soon.

Wednesday, March 19, 2014

Cake Pops!

Table-top Kitchen at Expo West
Natural Products Expo West was a blast! I had tons of fun, and met lots of great people.  I had created two recipes for cake pops specifically for the show, and I was so happy to find that everyone loved them.  It was hard to keep them on the table - they were devoured so quickly!  

And everyone asked for the recipe.... 
The Device
So here we are, without further ado:

For these recipes I used a Bella Cake Pop maker (there are other companies that produce cake pop makers, you don't necessarily have to have a Bella).  Make sure to follow the directions with your appliance! The instructions for the Bella maker say to season the cooking surface <- this is VERY important, you don't want your creations to stick to the surface.  In addition, if the maker says to throw out the first batch or two, do it.  I know it will be painful to just throw the first ones away, but trust me, you should (they don't taste good).

On with the baking!

Vegan & Gluten Free Coconut Cloud Bites®
with Hodgson Mill Coconut Flour


Makes about 24 Cake Pops (this recipe can be doubled)
Whisk the egg replacer and
warm water together until
smooth.  Put aside.

Coconut Flour!
½ cup       Hodgson Mill Coconut flour
¼ cup       Morena Non-GMO pure cane sugar (or organic cane sugar)
1 tsp          Rumford aluminum free, double acting baking powder
¼ tsp         baking soda
¼ tsp         Hodgson Mill Gluten Free Xanthan Gum
¼ tsp         salt
2 Tblsp     Ener-G Egg Replacer
         +
½ cup       warm water
¼ cup       virgin coconut oil, melted
½ cup       coconut milk (non-gmo soy, almond or rice will work too, but coconut is best)
½ tsp        vanilla


Whisk the egg replacer and the warm water together until smooth, set aside.   Mix the dry ingredients in a medium sized bowl, then stir in the wet ingredients.  Mix until uniform.  Place the batter in a pastry bag (or a food-storage bag with the corner cut off) and squeeze the batter into your cake pop maker.  You want to fill the wells just a bit higher than the edge, but don't fill them up too much - the batter will squeeze out from the wells and you'll have a big mess (I found this out the hard way).  Cook about 3-5 minutes (you can open the pop-maker after three minutes to check- if they're not done, leave for another minute or two.  Try to resist opening it any earlier than 3 minutes - I know they smell delicious and you'd like them to be done even sooner, but if you open the pop-maker too early, it will destroy your sweet, wonderful creation).  Open cake pop maker and let stand about 30 seconds before carefully removing cake poppers. (A bamboo skewer and a spoon work well for this- nudge the pop with the skewer and roll it gently onto the spoon. Don't try to dig the pops out with anything metal- metal utensils will damage the non-stick surface)  Allow to cool (centers will be very hot when fresh out of the appliance).
mixin' dry ingredients
together


*Coconut Cloud Bites® name and recipe are Registered Trademarks of snackforyourmind.blogspot.com


First couple of batches might not be
so round.  Don't worry! You'll get it!

Vegan & Gluten Free Chocolate Almond Dream Bites® with Hodgson Mill Almond Flour


Makes about 12 to 15 Cake Pops 
(you can double this recipe too, if you like)
     
1 cup           Hodgson Mill Almond Meal
1/3 cup       cocoa powder (non-alkaline)
3 Tblsp       Morena Non-GMO pure cane sugar (or an organic cane sugar)
¾ tsp           Rumford aluminum free, double acting baking powder
¼ tsp           baking soda
¼ tsp           salt
½ tsp           Hodgson Mill gluten free xanthan gum
2 ¼ tsp        Ener-G Egg Replacer
      +
3 Tblsp       warm water
2 Tblsp       organic virgin coconut oil, melted
¼ tsp           almond extract
¼ cup          coconut milk (non-gmo soy, rice or almond will work, but coconut is best)

Whisk warm water and egg replacer together until smooth, set aside.  Mix the dry ingredients together in a medium bowl.  Add wet ingredients and stir until uniform.  Scoop the batter into a pastry bag (or a food-storage bag with the corner cut off) and squeeze it into your cake pop maker.  You want to fill the wells just a bit higher than the edge.  Again, don't over-fill, the batter needs some room to expand (this recipe takes a tiny bit less batter than the Coconut Clouds®.  Cook about 3 to 5 minutes.  Open cake pop maker and let stand 30 seconds before carefully removing cake poppers. (again with the bamboo skewers and a spoon.) Please, allow them to cool a little (the centers will be very hot when fresh, and burnt tongues are not fun).
One Hot Pop - Yes,
the photo is blurry.  I had to
roll the cake a bit so it
didn't burn my hand.


*Chocolate Almond Dream Bites® name and recipe are Registered Trademarks of snackforyourmind.blogspot.com


These bites are tasty; great for an after-school snack, for parties, or whenever!  I tried two other versions at the show too - I mixed in some Vegan Coconut Bacon (yes, that's what you just read, Vegan Coconut Bacon - and it's Gluten Free too! How cool is that?) from Phoney Baloney's, and some maple syrup into the Coconut recipe - seriously delicious savory sweet!
  And then, there were some lovely folks there from Texas: Barton Creek Crossing (Kenny and Willi Ann, with their amazing little girl Abby!).  They make some incredible Pumpkin and Apple Spreads.  Willi suggested trying pumpkin with the coconut, so we did.... and an incredible treat was born! Like eating the middle of a pumpkin pie.

And I intend on experimenting more - we'll just have to see what turns up.
But most importantly, eat them and enjoy!

Sunday, January 19, 2014

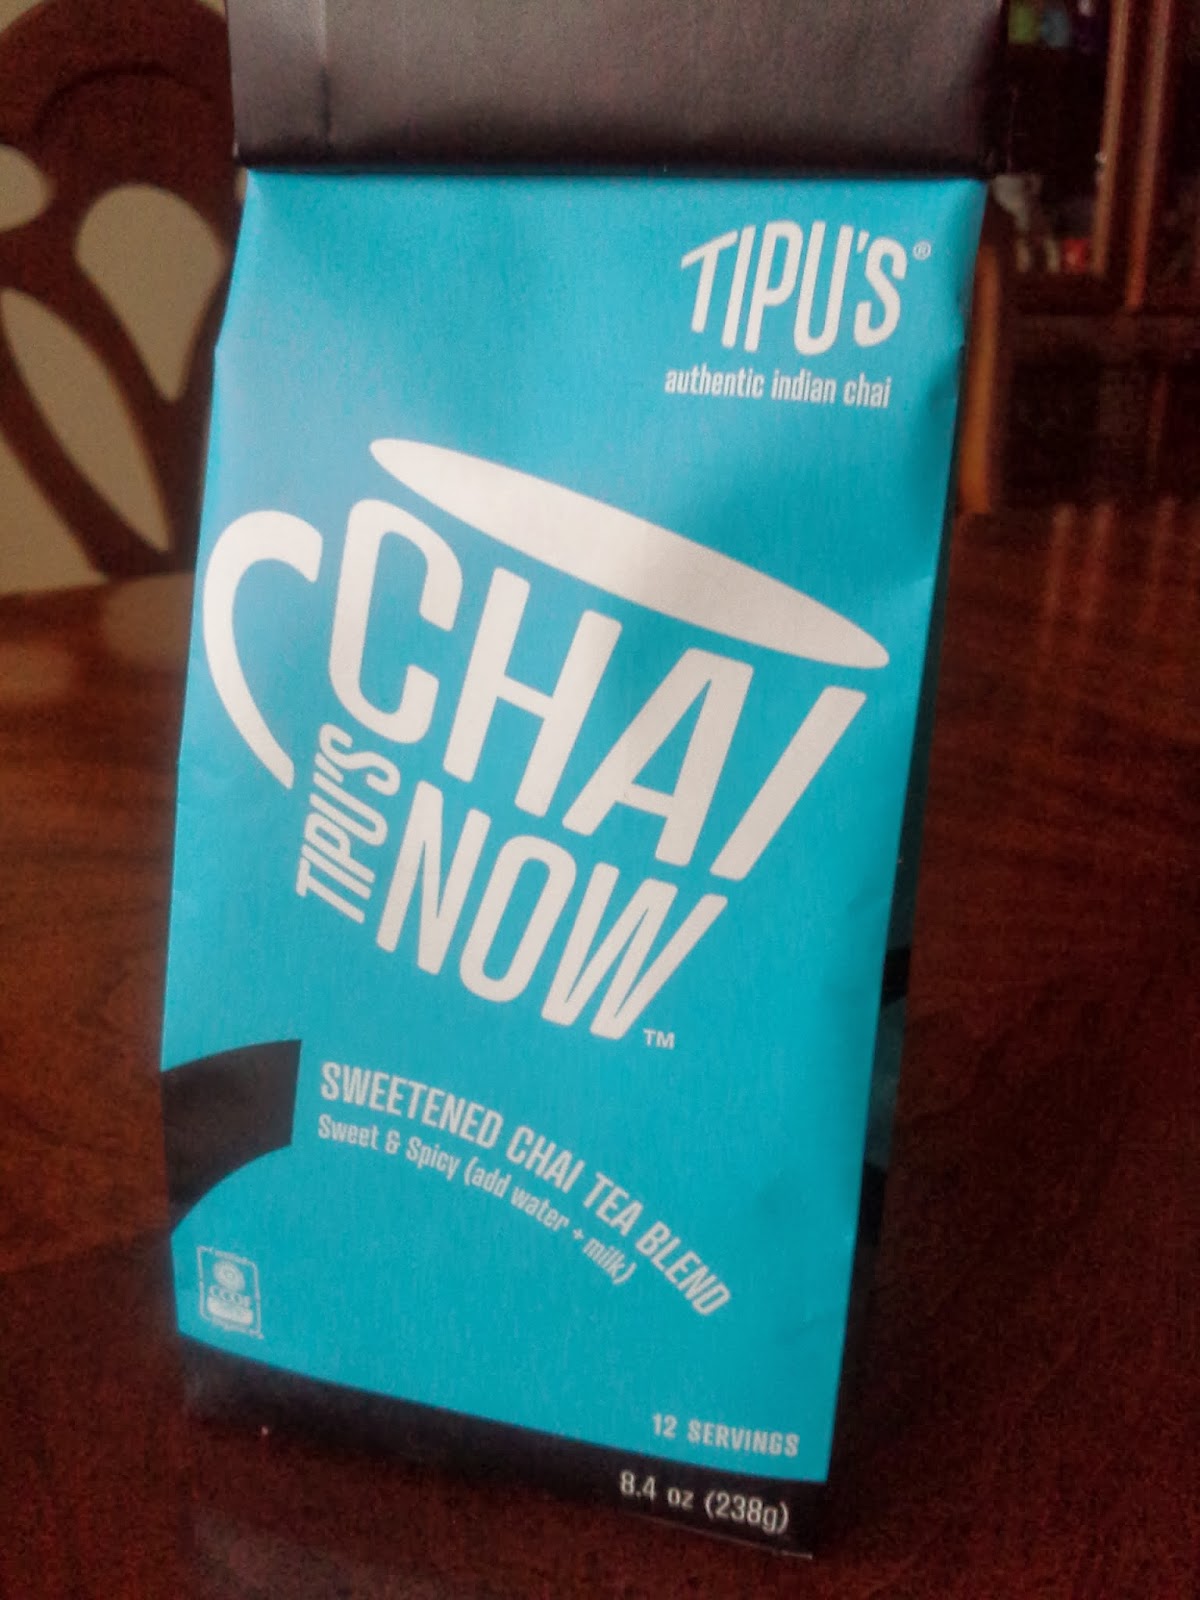
Tipu's Chai Review

motivational packaging
It comes in adorable fold-over-the-top brightly colored bags.  They even give you words of encouragement as you open the package.  And opening this bag of Tipu's® Chai could be the best decision you ever make.
 
The depth of flavor in this chai is incredible! You can taste the bright, organic spices. No bitterness here. Been out snow shoveling? This will warm you up from the inside out! It has that delicious, complex aroma - like the first bite of a slice of home-made pumpkin pie, or freshly baked gingersnap cookies.  So robust, yet perfectly balanced; it has a combination of spicy and sweet that has been named a top product (rightly so), and has been featured in Prevention Magazine, Organic Spa Magazine, Tea Magazine, and New Hope 360.  Garnering awards at the 2008 World Tea Expo, and with numerous happy customer reviews, this tea blend is taking the Chai-drinkers by storm.
Look at that rich caramel color!
The recipe for this tea was passed down by his Grandmother to his Mother to Bipin Patel, and there is no question; you can taste the love in this tea.

A brief history of this marvelous beverage as it appears on tipuschai.com:
"Tipu's® Chai was originally served in a popular Indian restaurant founded by Bipin Patel in Missoula, Montana, in 1997. Bipin’s authentic Indian chai was in high demand and quickly became a favorite menu item. Before long, he started selling it to other restaurants, local businesses and coffee shops. Then, in 2007, Bipin sold the restaurant to focus his efforts on sharing his grandmother’s special recipe with the world."

Tipu's makes their original slow-brew certified organic chai tea, in regular and decaf.  They used to offer a liquid concentrate as well, but in order to be more environmentally friendly, they discontinued it.  This really is a great thing; the environment wins (less packaging/waste), you win (more tea at a better price/smaller shipping cost), and Tipu's wins (they sell more tea).  That's just an all-around good deal.


The Simple Life
Their newest line is called Tipu's Chai Now®.  It's a micro-ground "quick brew" tea and comes in three varieties:
Tipu's Chai Now® The Simple Life (tea, organic spices, ginger; you add milk or milk substitute, or milk and hot water, and sweetener if you wish).

Chai Tea Latte Blend
Tipu's Chai Now® Sweet & Spicy (tea, organic evaporated cane juice, organic spices, ginger; add hot water and your choice of milk or milk substitute).

Tipu’s Chai Now® Latte (organic evaporated cane juice, organic Non-GMO soy milk powder, tea, organic spices, ginger; a full on package - all you need is hot water, and a mug of course.  This one is great if you're in a hurry, or tired of shoveling snow, or anytime for that matter).
Sweet & Spicy

All three are Vegan, Certified Kosher, and made with the highest quality, organic ingredients.

With Tipu's Chai Now®, you will notice some spices and tea bits that settle to the bottom, but this is a great indication that the ingredients are REAL.  There is no artificial anything in these Chai blends!  They are FREE of chemicals and preservatives.  What more can you ask for?  If you are a chai drinker, even just the occasional sipper... I highly recommend that you try Tipu's Chai.  If you're a more adventurous Chai drinker, Tipu's also has many different recipes that you can experiment with like 'Hot Apple Chai-der''Chai Nog', or 'Tipu's Chai Now Frappe'.

You can get your bag of Tipu's Chai online at http://www.shop.tipuschai.com/, or look for a retailer that sells it near you .  If you don't see it in your local store or coffee shop but would like to, ask your store manager to request retail information from Tipu's online.

Saturday, December 28, 2013

Thumbprint Cookies


There are many recipes for thumbprint cookies out there.  In cookbooks, magazines, on the internet.  Though I have yet to come across one that matches this recipe.
Very loved, much used cookbook.

It looks short and unassuming, coming from a 1970s church cookbook, with few ingredients.  The result, however, is a cookie that vanishes quickly.  You'll swear your relatives are also somehow related to cookie monster.
This recipe is something I also hold near and dear because it is one handed down through generations.  My Great Grandmother used it, then my Grandmother, my Mom (Mom still uses it), and now I use it.  Handed down through generations of Swedes, I thought I would share it with my readers, so they/you can enjoy it too!

Save the Egg whites!
You can make an omelet,
or meringues!
As written by Ellen Almst [with my kitchen notes]
•  1 c. butter
•  1/2 c. sugar
•  2 egg yolks
•  1/8 tsp. salt
•  2 c. flour [you may want to sift]
•  1 tsp. vanilla
•  1 tsp. almond extract
[• jam/jelly of your choice (I usually use currant, raspberry, or apricot.  I find that something with a bit of sweet-tart works best and compliments the sweetness of the cookie dough.)]

Found this great locally produced
butter (local to Mom & Dad).
Hormone and Antibiotic Free!
Cream butter; add sugar and remaining ingredients in order given.  
[I use butter pretty much straight out of the fridge.  Coldness of the dough is important in this recipe.  When you beat in the sugar, the sugar will create air pockets in the butter.  These later fill with steam during baking and will make a nice, light, melt-in-your-mouth texture.]


Make small round balls and make [an] indentation with thumb.  [Once again, dough temperature is key.  Don't handle the dough any longer than you have to.  If you're one of those people who often have cold hands (I do sometimes), you're in luck.  If you have warm hands, you may find it helpful to wash them in cold water before you form the dough - when it gets too warm it gets sticky and difficult to handle.
If you have to walk away from the dough for any extended period of time; i.e. an emergency last minute Christmas present you forgot to buy, put the dough in the fridge.] Fill indent with jam.  Bake in moderate oven (350º F) about 10 minutes.  Watch closely.  [It's important to watch them.  No, they don't jump, or do tricks, but they will brown too much if you're not careful.  With my Mom's oven, for example, the cookie sheet must be turned 180º at the 5 minute mark because the back of the oven is warmer than the front.  With my oven at home, I can place the cookies in and leave them be for the whole 10 minutes.]
These cookies are seriously delicious.  You may want to make a double batch for your cookie monsters.

Mmmm.....Cookies.


Wednesday, November 13, 2013

Gluten Free Blueberry-Lemon Cupcakes with Coconut Oil/Buttercream Frosting

NO GMOs here!
'Holy blueberry cupcakes Batman!!!'
This one's a winner.  Winner of what, precisely, I'm not sure, but the end product is super tasty.
It all started with a Hodgson Mill® gluten free yellow cake mix.  You may have noticed my excitement about this company and their products - let me reiterate; they are a Family Owned company, dedicated to transparency of ingredients & green business practices, their products are made right here in the U.S. of A., there are NO preservatives, NO gmos, and NO 'unpronounceable ingredients' all at a very reasonable price.  Honestly, what more can you ask for?
So yes, I was in the mood for cupcakes; unconventional cupcakes.  Suddenly I remembered the enormous amount of organic blueberries I still had in the freezer...
And some lemon would be nice, with frosting of course (That goes without saying. It is not a cupcake unless it has frosting on it, and to call something a cupcake and not put frosting on it would be blasphemous).

I used some parts of the recipe on the box and came up with this:

• 1/2 cup butter (one stick), softened
• 2 large eggs
• 3/4 cup milk
• zest of one lemon
• 1/4 cup lemon juice (I squeezed the zested lemon and added about 3 or 4 more tablespoons for a total of 1/4 cup.  You may need more or less depending on the size of the lemon.)
• 1/2 teaspoon vanilla extract
• 1/2 teaspoon almond extract
• 1 box of Hodgson Mill Gluten Free Cake Mix
• 2 cups fresh or frozen blueberries (I used frozen - there's a really great organic blueberry farm near me.  I usually buy about 20 lbs of organic blueberries at a fantastic price - about $2 a pound-  freeze them, and then use them throughout the year.  It pays to shop local.  Check out some of the links on this blog to find the local farms near you! You may be pleasantly surprised to find out whats right in your backyard.)

* A Note about blueberries (and other produce): If they are fresh it's great. Frozen is ok too.  More importantly, if you can afford to get organic berries (this includes other varieties, like strawberries), do it.  You can't peel berries, so any pesticide or other chemical that is sprayed may absorb into the fruit's skin.  There is only so much that washes off...you're eating the rest (Yuck!).  Here's a link to the EWG's shopper's guide to help you avoid pesticides in your food: ewg.org 2013 shoppers guide

Back to the recipe.
Evil Sifter

For the frosting, I used the Original Wilton Recipe with a few adjustments:

• 1/2 cup organic virgin coconut oil (much better for you than shortening)
• 1/2 cup (1 stick) butter, softened
• 1 teaspoon vanilla extract
• 4 cups sifted confectioners' sugar (approximately 1lb.) - (I know sifting is not fun.  I share your resentment, especially with a sifter handle that once tried to slice off my finger- long story.  Try to think of something else while you're sifting, or call your Mom, or listen to some soothing music.  The point is, you really do need to sift the sugar, and you will be more thankful when your frosting comes together, all beautiful and smooth.)
• 2 tablespoons lemon juice

Preheat oven to 350ºF.
In your mixing bowl, cream butter.  Add eggs, mix.  Add milk, lemon juice, zest, vanilla & almond extract and blend well.  Add cake mix and combine thoroughly.  Gently fold in the blueberries.
Fold in frozen berries gently
unless you want purple cake.
Spoon into paper-lined cupcake pan.  Bake for about 24-28 minutes, or until inserted toothpick comes out clean.  Allow to cool completely before frosting (coconut oil is very heat-sensitive).  You'll end up with about 18 cupcakes.

On to the frosting!  In your mixing bowl, cream butter.  Add coconut oil and combine well.  Add sifted sugar while mixing, one cup at a time, to prevent powder-coating your kitchen.  The mixture should look all crumbly, and a little like fake snow.  This part is pretty neat to watch - add the lemon juice and vanilla and mix thoroughly - the mixture rapidly transforms from crumbly mess to velvety smooth frosting!  You can spread this on with a knife, or you can go the fancy route with a decorating bag and tip (this makes for a great presentation, and it's just plain fun.)  When you're done, serve or store in an air-tight container (if there are any left).  Enjoy!

Monday, November 11, 2013

We got the beets!


Pickled Golden Beets ready for eating!
Pickled beets have a tendency to disappear in my household, like they were 'going out of style' or something.  Yes, I eat some too, but the rate at which they vanish is rather alarming.  So, I have taken to preparing them at home.  This seems to be somewhat more cost effective (I think. I haven't actually sat down and crunched the numbers).  And really, that's not the only point.  The bigger issue is controlling the amount of unwanted 'extras' in your food.  By preparing your own food from scratch, you can eliminate a lot of preservatives and other unsavory ingredients.

When setting out on the quest of preparing home-made beets, one must decide whether to go for the refrigerator-canning method, or shelf stable.  I'm still somewhat intimidated by shelf-stable canning (though I've heard that its not very complicated...perhaps I shall attempt this in the near future), so I continue to opt for the fewer-steps refrigerator method (throw whatever it is you made in a clean jar with a lid, and put it in the fridge).

When I made pickled beets for the first time, I had found a relatively simple recipe for refrigerator pickled beets.  My husband, a self-proclaimed pickled beet aficionado, tasted this first batch and declared it to be much too sweet.  I agreed (he comes from one of the regions in Europe - former Yugoslavia - where people eat a lot of pickled food, so this is one area of cooking where I don't argue - in fact, I'm just going to own up to it and say that, in reference to anything pickled, he's right most of the time).  Several batches later, I had honed the recipe amounts down to a very tasty, much less sweet version (about 1/4 the sugar, more vinegar & garlic), which I followed for this batch.

(These amounts are for a large batch -  about 6 or 7 lbs of beets - I wasn't kidding when I said they disappear FAST.  You can cut the amounts in half for a smaller batch.)

6 to 7 pounds fresh beets (This time I was able to buy all organic, and there were golden beets available!)
6 cups vinegar
4 cups water
1 cup sugar
8 to 10 large garlic cloves, thinly sliced (you can add more if you like)

You can bake or boil your beets (the cooking method for the beets and the brine are pretty spot-on in the original recipe).  I use the boiling method (I feel like its easier to monitor them this way, especially if your beets are different sizes or vary greatly in size from one batch to the next).  The larger the beets are (the ones in this batch were particularly gargantuan), the longer they will need to boil.  The original recipe says about 25 to 30 min.  I use this as a starting number, and poke the beets with a fork every additional 5 to 10 minutes or so.  As they reach 'fork-tender,' I remove them one-by-one, and place them in a bowl to cool (this way, all beets can be evenly cooked regardless of size).  I usually make the brine while the beets are cooking (to a large saucepan add vinegar, water, sugar and garlic, "bring to a boil, stirring until sugar melts. Reduce heat and let simmer approximately 5 minutes. Remove from heat and let cool before adding the cooked beets." - method from whatscookingamerica.net).  Then you may go wreak havoc somewhere else, and everything will be cooled off and ready for assembly when you return.
No pink hands here.
Hand peeling is a great way to get
involved with your food.
(it's also the least wasteful method)
When they're cool enough to handle, beets are very easy to hand-peel (pushing with your thumbs) but please - do yourself a favor and wear gloves, or you will have vibrantly pink hands for a few days.  Slice the beets, place in clean glass jars, pour in enough brine to cover, put on the lid, and shake like the dickens! This will make sure the bits of garlic are evenly distributed and will remove any air bubbles that may be trapped between beet slices.  (If there are a lot of air bubbles, you may need to top off with more brine after shaking.  Also, you really want to be sure you have a decent jar and lid that seal tightly, unless you are redecorating).

Another note about glass jars...
Glass jars are wonderful for storing a number of things; beets, home-made salad dressing or spaghetti sauce, home-made apple sauce, lemon juice, etc.  They're better for you than plastic storage (No BPAs or phthalates), and they go through the dishwasher like a charm!  Plus, if you find jars with the right size mouth - you can replace any lids that might rust with Ball canning lids. Bonus!  So the next time you are grocery shopping, think not only about what you need to buy, but the container it comes in - some brands of spaghetti sauce, coconut oil, jams, salad dressings, and other foods come in heavy, quality glass jars that can withstand a little heat.  I am developing quite the collection, as my husband will attest, though he doesn't complain about them if I am making pickled beets.....funny.
Said to Husband:
 "No, my collection of  glass jars is
not taking over the kitchen.
Delicious!

So, into my wonderful glass jars went all those organic beets.  I was particularly excited to see the brilliant color of the golden beets! (The more bright colored vegetables you can get into your diet, the better: lots of carotenoids and antioxidants.)  Here's to eating more veggies and happy pickling!